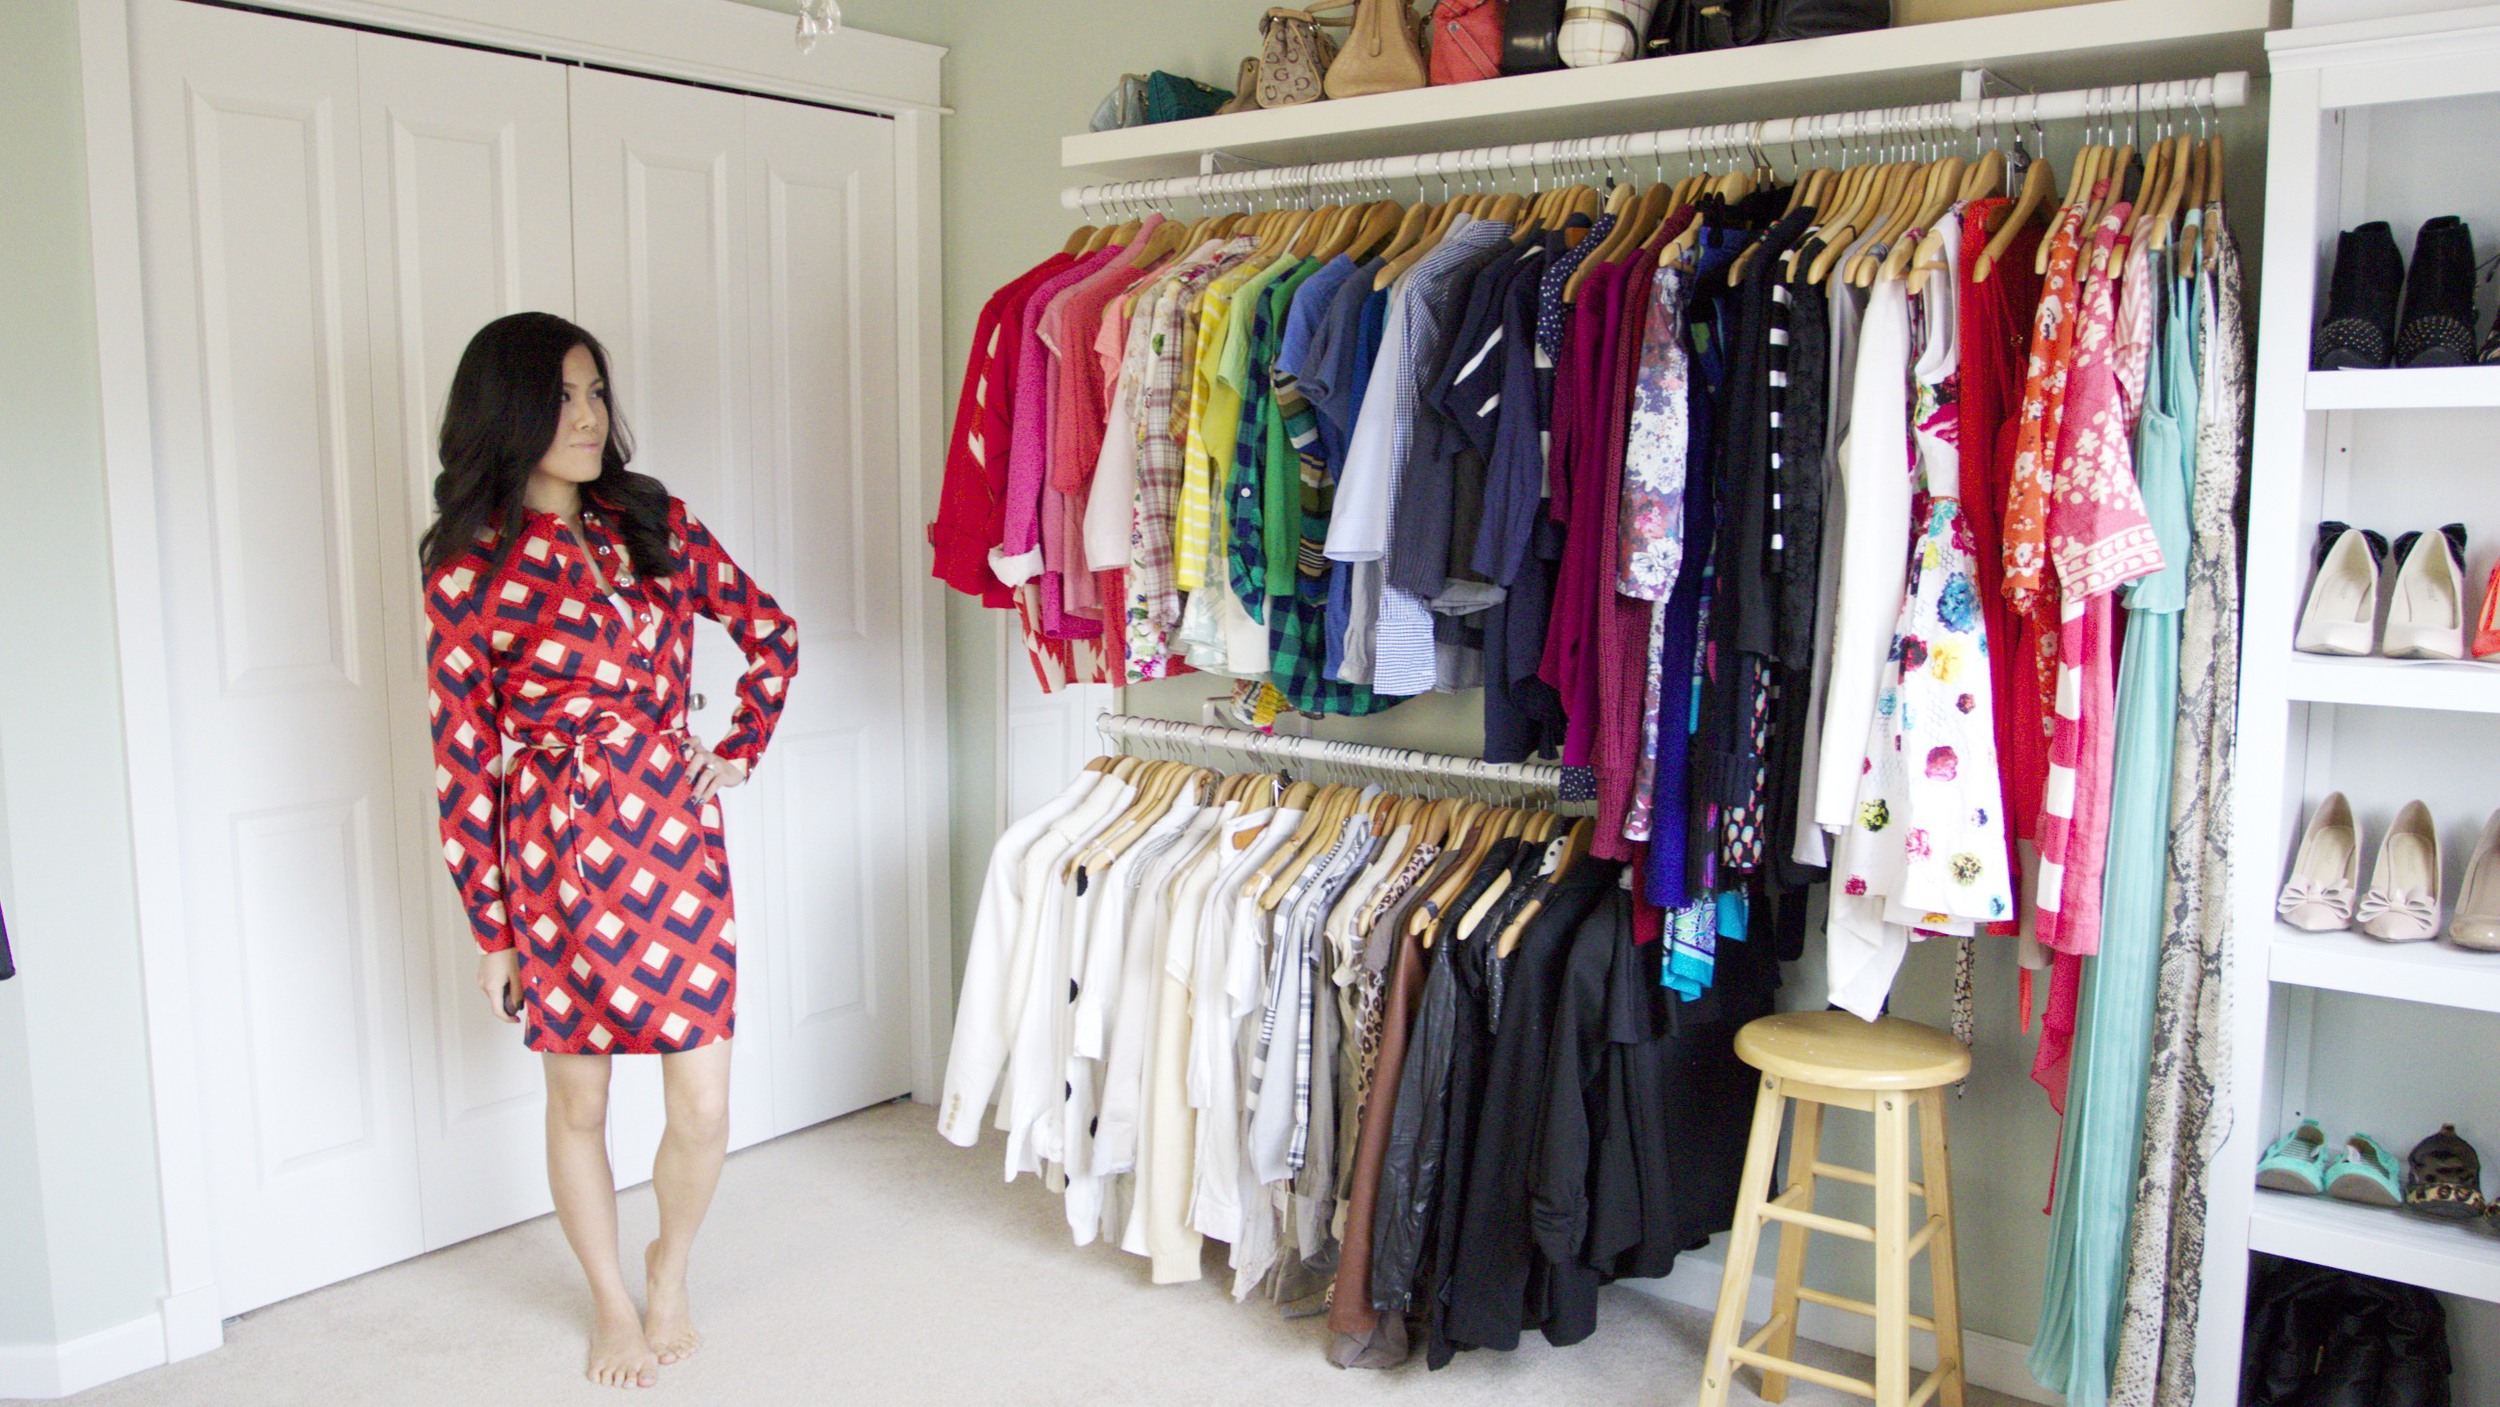
Welcome to the Closet


Hey loves! I finally finished my closet! You can check out the "before" here, but this one is my permanent fix and I couldn't be happier! It's as close to a dream closet as I'm going to get right now, so I thought I'd share some pictures & what I used.

STEP 1: Setting the Mood

The first thing my fiancé and I installed when I moved my closet to this spare bedroom was this super inexpensive chandelier from IKEA. Maybe it's a girl thing to be attracted to everything that sparkles, but I've always wanted a glass chandelier.
Most places sell them for $200 - $2,000, but you can find this small KRISTALLER chandelier for only $39.99 here.
STEP 2: My Perfect Wall Color


I wanted it to feel bright and happy when I walked in, and like a breath of fresh air. Not too bright; soft but not too muted; happy, yet calming. What was most important was that it was light, yet enough to pop against my white molding.
The color I chose was Mild Mint (UL210-9) in a flat/matte finish (here). (Having glossy walls in not good for photography.)
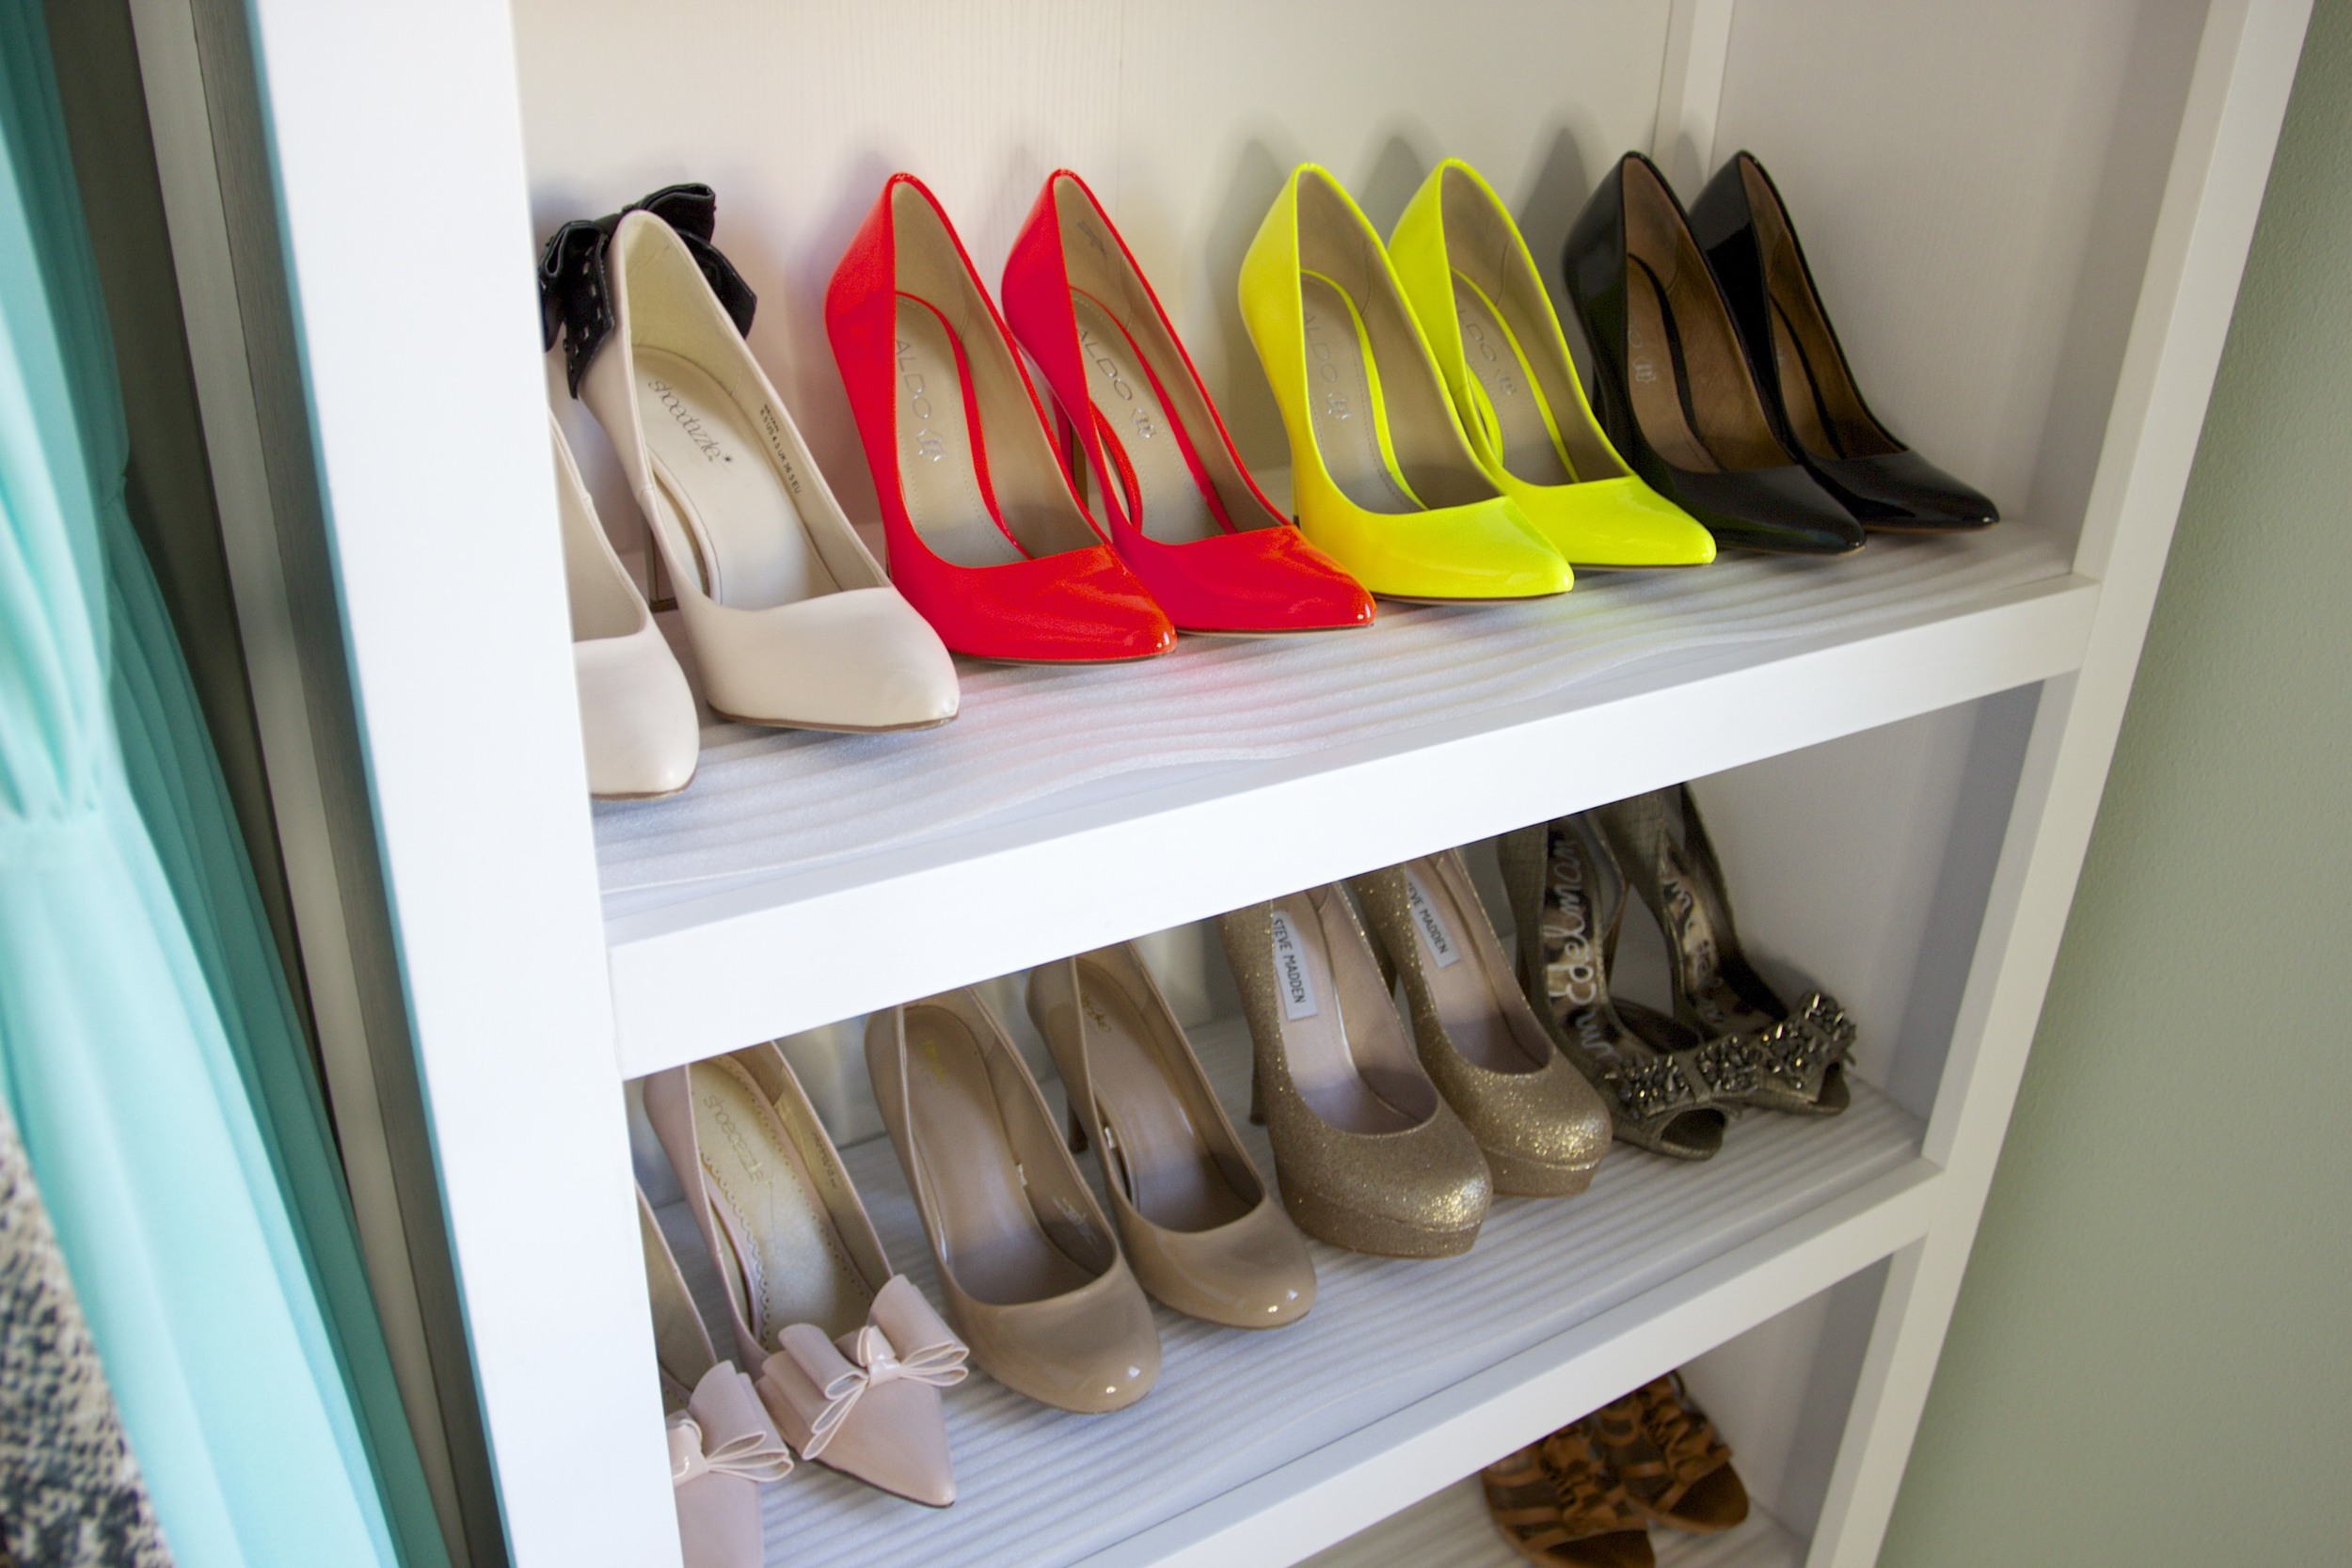
STEP 3: The Shoecase

The next thing was finding a place for my shoes. I knew I wanted a white bookcase to match the room, so trying to save money, I went searching at IKEA first. The cheapest bookcase they had (here) that was like what I wanted was their HEMNES bookcase for $155!!
It was still more than I was willing to spend so Ian suggested I try TARGET, and good thing too, because I found a better quality one for $109! (In my Closet Tour video I said $90 because I was mistaken, it's $109). I LOVE this bookcase because the shelves are so sturdy and adjustable! It's called the Threshold Carson 5 Shelf Bookcase. Find the bookcase here!
STEP 4: The Hanging Bars


Here's what you'll need to recreate my hanging system (of course you can modify it to your space):

(1) ClosetMaid SuperSlide 6ft (72in.) White Closet Rod - $8.98/each (here)
(1) ClosetMaid 2ft.-4ft. (24in.-48in.) White Closet Rod - $6.98/each (here)
(4) Closet Pro 10in. x 3/4in. White Shelf & Rod Bracket - $3.29/each (here)
(8) screws
A power drill (with drill sizes matching your screws)
A studfinder
A leveler/ruler
The brackets actually hold 250 pounds each if you screw them into studs using a STUD FINDER, so a total of 500 pounds per pair, which is a lot! Of course I wouldn't be doing pull-ups on it. Haha
Here's the blueprint I drew out before mounting the system. Of course it depends on your space. :)

STEP 5: The Top Shelf

To complete the closet I added a shelf to the top of the top wall brackets. The top wall brackets actually have holes in them, that that meant for mounting a shelf on top. Instead of getting the 1/2 inch thick shelf from Home Depot though, I opted for the 2 inch thick LACK shelf from IKEA for a more modern look. It's only $19.99!
Anyways, I hope this gave you guys some ideas on building your own dream closet spaces! Not everyone can have a Mariah Carey closet but we can all dream right? Good luck! xo JN
**UPDATE: Since this post, my closet has been featured on the Lucky Magazine website here, check it out!